API Keys
Customers on our Enterprise plans will have access to the JobBoard.io API. The API allows for additional ways to export data, or even build custom integrations. In this doc, we'll cover management of API keys on your site. You'll be able to create different keys for different vendors, and manage what your partners have access to. Technical documentation for the API is available here.
Your First API Key

The first API key you generate will always be the Master Key. We recommend you reserve this key for internal use, and refrain from sharing with outside vendors. The Master Key has the ability to modify or delete anything on your board, so you'll want to be careful with who you give that access to. When you create the Master Key, the name will be automatically populated and you'll see a notification as in the screenshot above. We recommend you do not change the name for this key, as this will ensure it's easily identifiable moving forward.
Child Keys
Any key created after the Master Key will be considered a Child Key. Child Keys will only have access to modify or delete objects that they created. This means you don't have to worry about a partner with a Child Key deleting or otherwise interfering with competing jobs, employers, etc. It's recommended you name your Child Keys in a way that will help you identify their purpose later. In most cases, this will simply mean naming the key after the partner that it is created for.
API Permissions
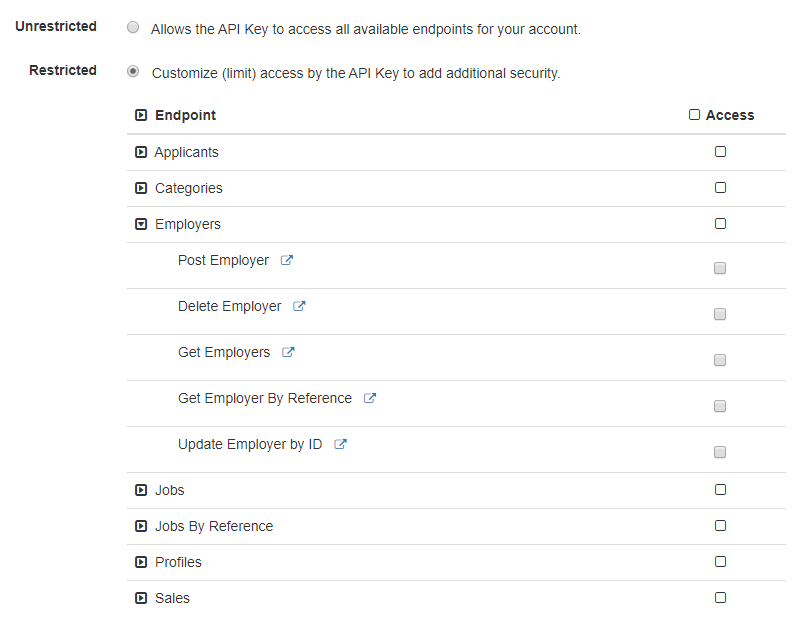
In addition to the restrictions placed on Child Keys, you'll be able to decide which API Endpoints each key has access to. If you have a partner that will only be sending you jobs, why allow access to your Job Seeker's personal information? With a few clicks, you'll be able to keep your data safe.

Unrestricted: Unrestricted Keys will have access to all endpoints. Unrestricted Child Keys will have access to all endpoints, but still be limited to modifying only those objects that they created.
Restricted: Restricted API keys will be limited only to those endpoints that you have explicitly granted permission for. To give access to a specific endpoint, simply check the corresponding box under Access.
Creating an API Key
Now that we know a bit about how API permission work, we're ready to create an API Key!
- Navigate to the API Keys section of your Admin Panel.
- Click Create a new API Key.
- Enter a Name for the key. If this is the first API key created, it will automatically be named "Master Key." We recommend you do not change the name for the Master Key.
- Choose whether the Key should be Unrestricted or Restricted.
- If you've opted for a Restricted key, check the Access box for any desired permissions. No permissions are enabled by default, so the API key will have no access if none are enabled.
- Click Create.
That's it! Your API Key is ready for use. To retrieve the full key, Click the Eye icon next to the key on the API Keys page. This will show the full key, so take care if there are others watching your screen. If an API key is compromised, you can click the Refresh icon to generate a new random key.
Updated 9 months ago
